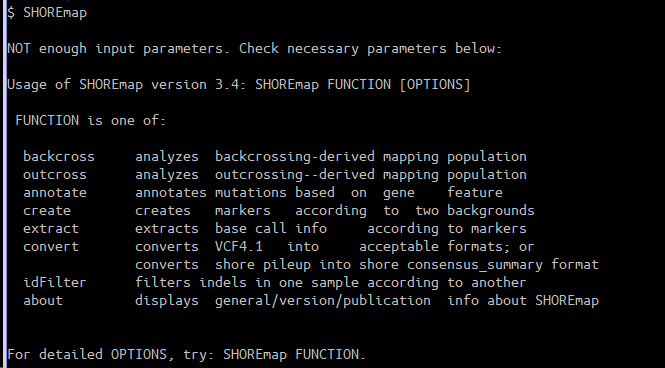
简介
SHOREmap可以用来分析传统作图群体(自然系natural strains和分化系,diverged accession杂交,或outcrossing)或近等作图群体(isogenic mapping population, 诱变后代与未诱变亲本进行杂交,即会交,backcrossing)所产生的重测序数据。根据作图群体构建方式的不同,SHOREmap的outcross或backcross采用不同基于滑窗(sliding)方式对等位基因频率进行分析。
SHOREmap的backcross和outcross都需要从突变重组库中获得的一致的碱基识别信息
安装
前置安装
SHOREmap需要DISLIN科学库进行数据可视化
但是在安装DISLIN之前还需要保证存在/usr/lib/libXm.so*和/usr/lib/libXm.so*,这两者的安全需要root权限,所以要么联系管理员,要么想办法绕开(这个办法,我还没有想到).
1 | sudo apt-get update |
开始安装doslin库
1 | cd /path/to/src |
安装SHOREmap v3.x
我这次安装的是当前最新的3.4版本,其他版本估计换汤不换药。
1 | cd $HOME/biosoft |
最后,可以重新启动一下bash验证
官方网站提供的两个常见问题的解答
Note 1: if the compilation complains like “/usr/bin/ld: cannot find -lXt” (or “/usr/bin/ld: cannot find -ldislin_d”), please open the makefile with the command
1 | vi makefile |
Press keys ‘esc’ and ‘i’ on the keyboard to edit makefile; move the cursor with arrow keys to the position before -lXt, and edit -L/path/to/libXt.so/; if ‘-ldislin_d’ is not found, edit -L/path/to/dislin_d/ before -ldislin_d). After that, press keys ‘esc’, type in :wq, and press enter to save editing and quit vi. (‘-L’ tells the linker where to find the library given by -l)
Note 2: if ‘/usr/lib/ld: warning: libXm.so.3, needed by ./dislin/libdislin_d.so, not found (try using -rpath or -rpath-link)’ occurs, and you have installed libmotif4, do the following:
1 | cp /usr/lib/libXm.so.4 /usr/lib/libXm.so.3 |
We can make SHOREmap avaiable for general use by inserting the following command into /etc/profile
1 | export PATH=$PATH:/path/to/SHOREmap_v3.x |
and
1 | source /etc/profile |
总体流程
OUTCROSS
| outcross的基本步骤 | 描述 |
|---|---|
| SHOREmap extract | 提取与SNP突变相关的重测序的一致的识别 |
| SHOREmap create | 根据背景/亲本系的重测序质量创建SNP标记列表 |
| SHOREmap outcross | 进行等位基因频率分析并定义mapping interval(也就是找到突变所在的大致区域) |
| SHOREmap annotate | 对mapping interval中的突变基因效应进行注释 |
BACKCROSS
| backcross的基本步骤 | 描述 |
|---|---|
| SHOREmap extract | 提取与SNP突变相关的重测序的一致的识别 |
| SHOREmap backcross | 进行等位基因分析 |
| SHOREmap annotate | 对mapping interval中的突变基因效应进行注 |
具体步骤
下载数据
只安装软件,却没有数据,我们也只能干瞪眼。
oucross分析所需数据
1 | # OCF2 |
backcross分析所需数据
1 | # BCF2 |
其他数据
除了最基本的测序数据外,我们可能还需要参考基因组,已有的注释数据等
1 | # 参考基因组 |
重测序
首先使用bwa,bowtie2等read比对工具将得到的数据比对到参考基因组上。
假设你当前处在MBS文件夹下,该文件下有如下文件
1 | # 混池测序结果,双端 |
以下操作都是基于上述文件进行。
第一步: 序列比对,产生SAM文件
1 | mkdir index |
第二步: SAMtools预测突变位点
为了加快运算速度,可以先转换格式,并排序
1 | samtools view -b -o BG.bam BG.sam |
consensus-calling program 寻找可能的变异位点
由于官方说明中使用samtools版本为0.1.19,先要解释一下参数 mpileup -uD -f,
1 | # -f:faidx indexed reference sequence file 前后版本一致 |
因此,对于1.4版本的samtools,相应的参数为
1 | mpileup -u -t DP -f |
官方说明的bcftools也是0.1.19,参数为bcftools view -vcg 旧版本的view在当前的版本用于过滤,功能被call替代
1 | # -v Output variant sites only (force -c) |
综上,推荐使用如下命令行
1 | samtools mpileup -u -t DP -f ../../../index/TAIR10_chr_all.fa ../../align/bwa/default/BG.sorted.bam | bcftools call -vm -Ov > BG.vcf & |
额外步骤:VCF格式转换
由于vcftools工具版本,所以最后的文件版本是4.2,而SHOREmap要求4.1。通过biostar找到高人写的降级工具(其实就是把一些字符替换一下,但是不了解vcf不同版本的差异话,是不知道怎么写)
把下面的代码存为vcf_dowgrade.sh
1 | # If you are trying to view VCF 4.2 files in IGV - you may run into issues. This function might help you. |
其实对于单个文件而言,可以直接用以下命令
1 | infile=BG.vcf |
使用SHOREmap寻找突变所在区
第一步:需要把bcf文件通过SHOREmap convert转换成SHOREmap能认识的格式
1 | SHOREmap convert --marker samtools.vcf --folder path/to/folder -runid int |
会生成三个文件3_converted_consen.txt, 3_converted_variant.txt and 3_converted_reference.txt.
第二步:提取候选分子标记的consensus information(mapping pool)
1 | SHOREmap extract --chrsizes chromsize.txt --folder ../SHOREmap_analysis --marker 11_converted_variant.txt --consen 11_converted_consen.txt -verbose |
第三步:
然后使用SHOREmap backcross分析。SHOREmap backcross可用来分析回交作图群体所得到重组后代混池数据。相对于传统作图群体,只有诱变剂产生的突变会分离,也只有这些才会用于突变定位。
SHOREmap backcross会尝试过滤出所有参考基因组和测序池之间不同部分用于找到突变点特异部分。为了保证不是自然变异或者是测序错误,测序池选择的部分要多次出现在亲本或背景中。然后根据前景和/或背景的(识别碱基,base calls,质量/覆盖率/等位基因)信息,确定是否把保留的SNP位点作为分子标记。在正确的筛选后(拟南芥大概有上百个标记),SHOREmap backcross就能在分析marker的AF后识别大致的峰。进一步对变异注释后,就能找到目标性状的候选基因了。
SHOREmap backcross所需的输入文件如下:
- 染色体大小文件,--chrsizes。分为两行,一行是染色体位置,一行是染色体大小。scaffold同理
- 候选marker文件。也就是使用SHOREmap convert通过vcf生成的converted_variant.txt,每一列的含义如下。
Column Description
1 Project name
2 Identity of chromosome
3 Position of the SNP-marker
4 Reference base
5 Alternative base (or mutant base)
6 Quality of the alternative base (ranging from 0 to 40)
7 Number of reads supporting the predicted base
8 Ratio of reads supporting the predicted base to total coverage
1 | SHOREmap backcross --chrsizes chromsize.txt --marker ../convert/11_converted_variant.txt --consen extracted_consensus_0.txt --folder ../BC_analysis -plot-bc --marker-score 40 --marker-freq 0.0 --min-converage 10 --max-coverage 80 -bg ../convert/12_converted_variant.txt --bg-cov 1 --bg-freq 0.0 --bg-score 1 -non-EMS --cluster 1 --marker-hit 1 -verbose |
第四步:对结果进行注释
1 | SHOREmap annotate --chrsizes chromsize.txt --folder ../BC_analysis/ann --snp ../convert/11_converted_variant.txt --chrom 2 --start 1 --end 4000000 --genome ../../TAIR10_chr_all.fas --gff ../../TAIR10_GFF3_genes.gff |